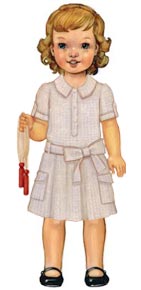
I'm totally in love with all the little details on this Jump Rope Dress pattern from Oliver & S. I've made a huge effort to take my time and achieve a really professional finish with this sewing project. I think that getting the details just right will be the key to making this dress look truly stunning.
Keep on reading if you'd like to to see how I got on . . .
Save 40% off all New Look and Kwik Sew sewing patterns for a limited time at Minerva Crafts.
This post is colossal, it would take forever to load so I've broken it down into sections to make it easier for you to read.Collar and Placket - You are here
Making the Collar
I'd normally skip trimming the interfacing but it will reduce the bulk on the finished collar seam which will (hopefully) give it a better shape and help it to lie more neatly.
I'd also normally skip the line of basting stitches to mark the seam allowance. But this collar is going to be front and centre so it needs to be perfect. If a line of basting will help me to achieve that I'm gonna take the time to do it.
Same with clipping the curve and pressing the seam allowance. I found it much easier to clip the curve accurately with a smaller pair of dressmakers scissors.
The row of basting stitching really helped the seam allowance to lie perfectly around the curve. I'm a little concerned it may pull at the fabric when I remove it exposing the raw edges where I've clipped to the stitching line but I'm gonna put my faith in the pattern and see how it goes.
I made a tiny mistake and started as if to stitch around the whole collar but it's just the outer edges that need to be sewn. Thankfully I got to the inner curve and checked the instructions in time to correct my error.
The instructions don't say to clip the curve before turning the collar. I've done it anyways, it can't hurt.
I pressed it carefully. The curve isn't perfect but I'm fairly happy with it.
Placket
I use some of my paper crafting tools to cut the paper pattern so I can use it like a stencil to transfer the pattern markings with a tailors chalk pencil.
To get the interfacing really accurate I measured the shaded area on the pattern and cut the interfacing to size. It's 1" x 7" which fitted perfectly.
It's a good job that the jump rope dress pattern includes diagrams otherwise I'd be in a right muddle with this bit! The placket has a left and a right side they should be cut with the fabric right side up. I seems that I have cut them with the fabric right side down. So my placket pieces are back to front. Thankfully I have enough fabric leftover to re-cut them.
So this is placket take 2. I've been super careful with the positioning of the placket. It's going to be very obvious if I get it wrong.
Following the instructions I was really careful to finish stitching exactly on the dot.
I used my rotary cutter to cut down the centre front of the dress.
When pressing the edges of the placket I've pressed the corner then the edges to give a really neat, crisp point.
Right Placket
I've pressed the right placket towards the centre front.
Then back on itself along the fold-line which just happens to line up perfectly with the edge of the interfacing. I'm so glad i took the time to cut and position it accurately.
The stitching also happens to line up perfectly with the edge of the interfacing.
I've trimmed the seam allowance a little differently to the instructions. First I've cut the corner at an angle before trimming the seam allowance.
I'm assuming the placket needs a good press before turning.
I'm inclined to top stitch the outside edge of the placket but the instructions clearly show just the bottom and inside edges are top stitched so I'm following that.
Left Placket
The left placket is sewn in the same way as the right. After taking my time with the right placket this was quick and easy. I think this is one of those patterns that looks really difficult but is actually pretty easy once you're used to it.
Finishing the Placket
After carefully arranging the layers I've top stitched them together at the base. My top stitching isn't as neat as I'd like but overall I'm quite happy with my placket.
Attaching the Collar
I wouldn't normally bother stay stitching the necklines but I'm really aiming for a couture finish so I'm taking the time to get the little details just right.
I use an overlocker to finish the shoulder seams.
I took my time pinning and sewing the collar in place making sure got it positioned just perfectly. Then slip stitched it in place by hand.
I opted to top stitch the collar.


