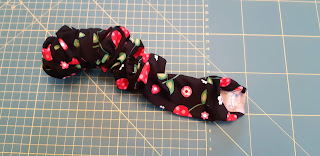
Whenever I have enough fabric leftover from a bigger project I make a matching scrunchie. It's a great way of making use of fabric scraps as well as being the perfect finishing touch to an outfit.
This scrunchie is availible to buy through my NuMonday shop or you can scroll down for full instructions on how to make your own.
Tools and Materials:
I earn a small commission when products are purchased through the links I post here (at no additional cost to you).
I've cut my fabric to 6" wide by 28" long. I've also cut a length of elastic 6" long. The width of the elastic doesn't really matter, I'm just using what I have on hand. I've pinned the end of the elastic to the wrong side of the fabric 3/4 of the way across. I've used a zig zag stitch to stitch the elastic in place.
I've pressed under about half an inch at the opposite end of the length of fabric.
Then I folded the fabric in half length ways
and stitched along the long edge.
The jumbo sized scrunchies are quite easy to turn right sides out with your fingers. Smaller sizes would need help from a loop turner.
The un-stitched end of the elastic is inserted into the other end of the scrunchie. And the pressed hem pulled over the join. Then a simple line of stitching through the fabric and elastic.
This scrunchie is availible to buy through my NuMonday shop or you can scroll down for full instructions on how to make your own.
Tools and Materials:
I earn a small commission when products are purchased through the links I post here (at no additional cost to you).
Linking Up To:
You can save this free scrunchies pattern in your Pinterest for later.
Here are some of my other free sewing patterns:
#simplycrafting #numonday #sewersofinstagram #sewist #sewersgonnasew #sewcialists #instasew #sewsewsew #sewistsofinstagram #sewingfun #ilovesewing #lovetosew #sewcialist #scrunchies #scrunchiesforsale


