I'm sharing how I made a set of quilted place mats for my new (to me) dining table. It's a beautiful antique style table and will look stunning in my new dining room. I'm keen to keep it that way so I'll be taking steps to protect it from getting damaged.
Tools and Materials:
I'd normally use quilting wadding in between my top and bottom fabrics but I've completely run out of wadding. I'm working on reducing my fabric stash so instead of running out to buy more wadding I'm making do with what I've got in my stash. Which happens to be scraps of fleece fabric.
I'm using a waterproof fabric for the backing to protect my new table from any spills.
Before you start each scrap of fleece or whatever thick bouncy fabric you're using in place of batting, has a straight edge on at least one side. I used my rotary cutter and ruler to trim one edge straight.
Then set your sewing machine stitch width to the maximum.
And the stitch length needs to be at maximum too.
Then butt the two straight edges together and sew over the join.
You'll need to push the edges together just slightly, not so much that they overlap but just enough that the don't separate when the sewing machine foot stitches over them.
You should have a larger piece of fabric that you can then cut down to your desired size.
I cut mine to 12" x 18".
Layer the quilting pieces backing fabric right side down, batting then the top layer right side up.
Pin the three layers together.
Then start quilting.
I'm using simple rows of straight stitches across the width of the place mats. Start with the line in the centre of the place mat.
Then use a quilting guide bar to position the next line of stitching. If you don't have a quilting guide bar you can mark the rows of stitching with tailors chalk or pins at either end.
Keep on quilting until you reach the outer edges of the place mat.
Now for the binding. Cut strips of fabric 2.5 inches wide. Pin the lengths together at right angles and sew diagonally across to join.
Press the seams open.
Then trim away the excess fabric.
Press the continuous strip in half length ways.
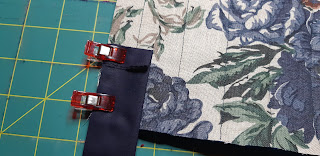
Fold the end of the binding over slightly. Line up raw edges of binding with raw edges of project an pin or clip it in place.
At each corner fold the binding away form the project.
Then fold it back on itself.
Cut the binding a little after the start of stitching so that the raw edge will be neatly hidden.
I'm using my 1/4 inch quilting foot for the sewing.
It has marks on the foot at 1/4 inch from the needle, this makes it really easy to keep a consistent 1.4 seam the whole way round.
After the binding is sewn in place form the front turn it to the back of the place mat.
It should just cover the line of stitching on the back of the project.
Stitch along the original line of stitching (stitch in the ditch).
Linking Up To:
Here are some of my previous quilting projects:
#simplycrafting #makersgonnamake #sewing #handmade #sewersofinstagram #dressmaker #sewistsofinstagram


