
Oh my goodness this dragon outfit is so stinking adorable!!
I've made it with Halloween in mind so it's sewn from thick cuddly rib fabric which will be lovely and warm on a chilly nights trick or treating. It's a little on the baggy side so it will fit over everyday clothing in place of a coat or pram-suit.
The features I've added aren't actually part of the Max and Meena Rompaloones pattern I've used. They're taken from the Mega Max Raglan pattern and I've hacked the patterns to make them fit the Rompaloones hood. I've altered the dragon wings a little and lengthened the body so it fits a little more loosely to be worn as an outer layer.
If you'd like to buy this Romper (it's a size 18 months) head on over to my NuMonday shop but be quick, I'll be having it myself before Halloween arrives!! If you'd like to see how to make your own carry on reading and I'll share exactly how I did it.
Tools and Materials:

 PDF sewing pattern.")


I earn a small commission when products are purchased through the links I post here (at no additional cost to you).
Cutting Out
My Little Pickle has quite a long torso compared to his leg length. His rompers are often pulled tight between his shoulders and nappy long before he grows into the leg length. To extend the body length I have cut across the body part of the pattern and added an extra bit of paper to extend the body by a few inches.
In order to accommodate the horns I added half an inch seam allowance to the front of the hood pattern piece. Then I cut away the first few inches of the hood front. This is based on the hood design included with the Mega Max Raglan pattern.
The tail, horn and spike pattern pieces are taken from the Mega Max Raglan pattern.
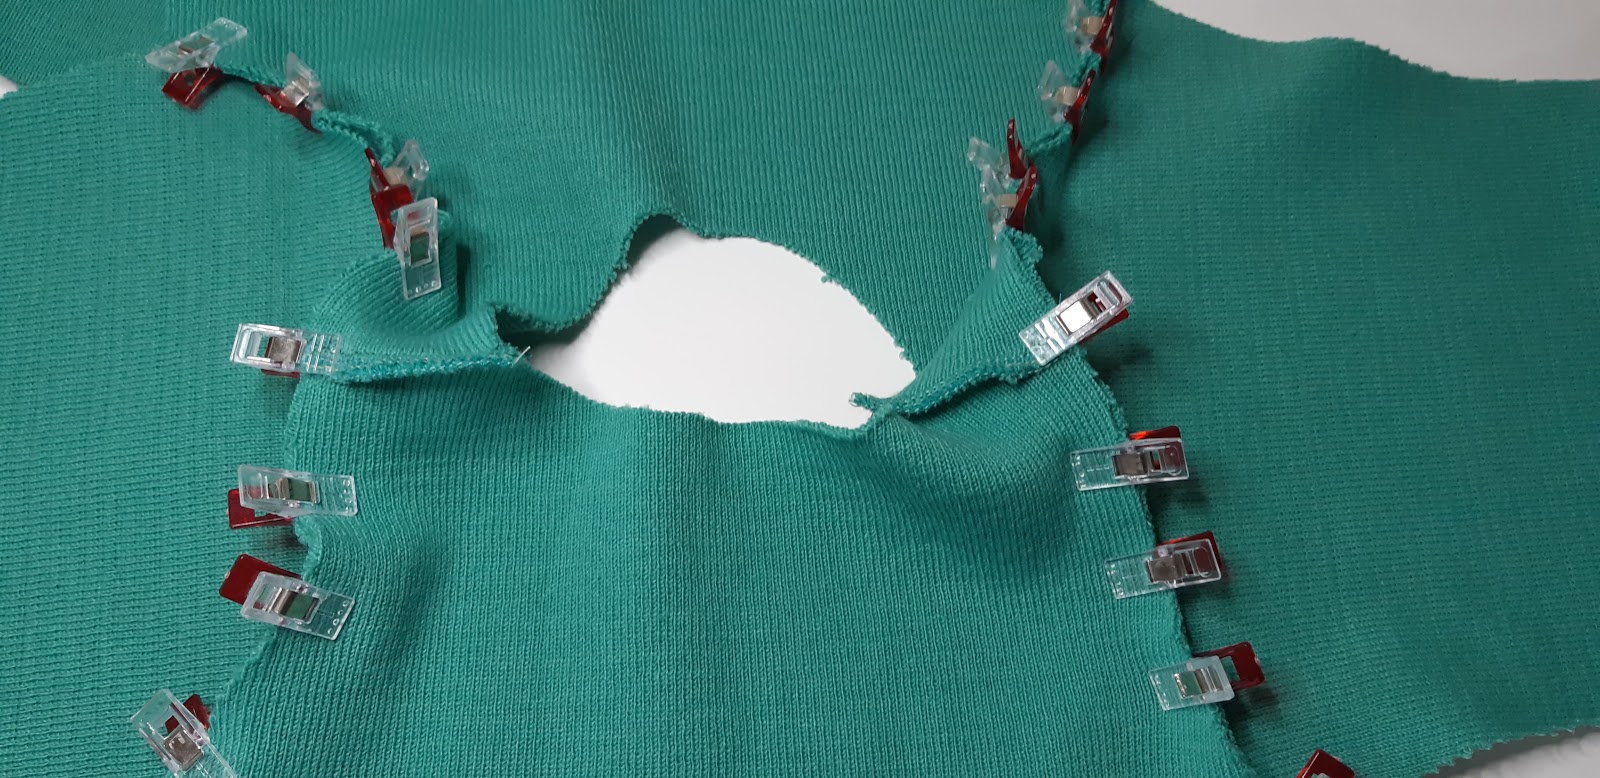
Bum Circle

The trick with the bum circle is to lay the body and the bum circle both right sides down. Then pinch the two pieces of fabric right sides together.

I normally use pins but this rib is very thick and stretchy so I'm using dressmakers clips to help keep it's shape.

I give the bum circle a really good press from both back and front before top stitching o the body side. This holds the seam in place perfectly.
Basic Construction

The basic construction is really straightforward, shoulder seams and then setting in the sleeves.
I double stitch all my seams, first with my sewing machine using a stretch stitch them again with my overlocker (serger).
Wings

The wing pattern is taken form the corresponding size of the Mega Max Raglan pattern.
I've applied interfacing to the wrong side of one of each pair of wings.
After stitching them right sides together I've clipped the curves and trimmed the seam allowance.

This gives a nice neat finish when it's turned and pressed.

I've eyeballed the stitching on the wings and added some extra lines of top stitching.

The wings are sewn into the sleeve seam first. I've rolled up the wings and pushed them into the sleeves so they are out of the way of my stitching.
You can see the inch or so of the wing sticking out. I re-arranged it after taking this picture, The wing needs pulling back that inch so that it doesn't overhang the sleeve or it interferes with the cuff.

It takes some jiggling to get the wing into the side seam.

Hood, Horns and Spikes

I'm starting with the horns. They are straightforward enough, sewn right sides together then thoroughly clipped. I've stuffed them with toy stuffing and sewn the open ends together to make them easier to sew in place.

I've sewn the horns in between the main part of the hood and the extra strip I've cut out.

The spikes are sewn in the same way as the horns. But I haven't added any stuffing as I want these to be quite flat.

The hood is then sewn up in the usual way - with a lot of clips to keep all those spikes in place!

Oh my goodness it's really coming together!!

The lining is sewn in place as normal.

Right sides together with the main hood.

And the hood is then stitched onto the rest of the romper.

Just look how cosy that looks!!
Snap Strips

I didn't cut the snap support strip. I've had an issue with the snap strip tearing on a recent pair of Rompaloones. I came across the idea of using a woven ribbon instead, so I'm giving that a try.

Lots of clips for sewing the snap strips in place.

I top stitch along the edge of the snap strips to make sure they're really secure.
Bands

I switch to a straight stitch when sewing my bands. It allows them to lie just a little flatter.

I also press them open to get a really neat finish.

Before sewing them in place.

And applying the snaps.
Tail

I've made lots of clips in the curve of the tail.

After stuffing it I've turned the raw edges to the inside. I'll hand sew it in place.

You can buy this Dragon Romper from my NuMonday shop or you can use the links below to get the materials you need to make your own.
Tools and Materials:
I earn a small commission when products are purchased through the links I post here (at no additional cost to you).
Linking Up To:

Here are some of my previous sews with the Max and Meena Rompaloones pattern.


#simplycrafting #sewingchildrensclothes #handmadechildrensclothes #handmadechildrensclothing #sewingkidsclothes #sewngforkids #maxandmeena