I'm a very lucky sewer (sewist?) and I have a huge inherited fabric stash. I bought some fabulously practical if not particularly aesthetically pleasing Kallax units from IKEA to store it all in.
It works a treat but I have to accept that there is no room for for anymore units. And besides 16 cubic feet of fabric should be more than enough. I'd like to store my paper crafting goodies in here too as well as make space for more fabric of course. So I'm on a permanent de-stashing mission.
I've discovered that it's better to use up all of a particular fabric when I'm doing another project with it. This blog post is turning into a story about how I achieve that consistently.
So here we go . . .
I made a skirt from some lovely Cherry print fabric I bought.
I like to make complete outfits at a time instead of random odd garments. So I made a matching top which I decided not to blog for some reason . . .
Instead of leaving the fabric scraps to languish in my stash taking up space and irritating me I pulled another coordinating fabric and made another top and skirt with the scraps.
So from one bought piece of fabric I got two complete outfits and used up two pieces of stash fabric that would otherwise have just been sat taking up space.
Whilst I'm very happy with my sewing on these items the quality of the fabric isn't too great and I've no idea what the fibre content is so I won't be selling this outfit. Little Miss is very happy about this and insisted on putting on her newest outfit straight away.
I've sewn up this pattern a few times now and it always looks really well. It's a simple top with a zipper in the back and a bit of colour blocking on the front which adds a lovely bit of interest without adding any fuss.
Tools and Materials:
Fabric is all from my inherited stash.
I earn a small commission when products are purchased through the links I post here (at no additional cost to you).
The first step is the colour blocking.
Then the centre back is sewn together leaving room for the zip.
I'm not afan of the zip, I think next time I make this pattern I'll use a loop and button instead. I'm not sure if it's just my sewing but the zip pull lines up perfectly with the tender skin on the back of the neck, to me that will be irritating and irritated kids if something I'm always keen to avoid.
I've over locked the two back fabrics separately so that they're both nice and neat but still ready for the zip to be inserted.
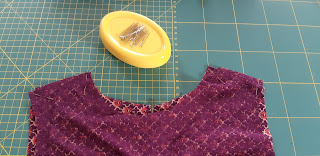
The should seams are starightforward.
As is the neck band, especially because of the gap for the zip.
The neck band just fits around the neck edge with no need to make it into a loop or make sure it's got enough stretch to go over the child's head.
I've top stitched the neck edge so that the seam is held in place - less irritation and also it looks neater from the front.
Then I've inserted the zip.
The sleeves are set in as normal.
And the side seams are simple.
I've used a twin needle for the hems as I think it makes a more professional finish.
I also made a scrunchie with the leftover scrap of fabric. The instructions are on my previous blog post here:
Linking up to:
Please feel free to use my instructions to make your own skirts. Here's an image to pin for later.
Here are some of my other designs made using Simplicity 1332:
#simplycrafting #sewersofinstagram #sewist #sewersgonnasew #sewcialists #instasew #sewsewsew #sewistsofinstagram #sewingfun #ilovesewing #lovetosew #sewcialist #sewingforkids #sewingforgirls #simplicity1332 #simplicitypatterns #fabricscraps


